
Artistic Process
/
0 Comments
During this past week I created some rough sketches and layout for a piece of art I’ll be submitting to an art exhibition open call soon. The inspiration for that painting came from coins and yet the subject is actually flowers! I’ll explain more in another post, once that art is finished. (Currently waiting on an order of Bristol board to be delivered to create the final piece.) Anyway, another piece of art I did was a watercolour painting of a scene just south of the Spittal of Glenshee.
I took a few photos and used them as reference photos for the rolling hills and fields that made up the subject of my painting. As I always, personally, enjoy seeing how other artists work - they’re process, stages and work in progress shots, I thought I’d create this post to show how my paintings start out and then how they end up, including the stages that come in between.
A few years ago when I did art passionately but not so seriously, I’d spend ages trying to sketch out things perfectly in pencil, erasing plenty of lead as I did so, in my attempt to create the best possible initial image from which to start. This frequently (1) took a lot of time and (2) ruined the surface of the watercolour paper (you’ll know exactly what I mean if you’ve done it yourself!) Now, though, I only really ever sketch with waterproof, pigmented, fineliner pens of, usually, very small nib. This forces me to get it right the first time and if I make an error, I just have to go with it. After working in pen for a while, it’s amazing how much you can make what seems at first like an irreparable mistake into a completely insignificant part of your overall artwork.
Here is my ink sketch for the landscape. I used a ‘XS’ Faber Castell art pen for this. I’m not too fussy about brands, though, I use Staedtler and Micron too frequently.


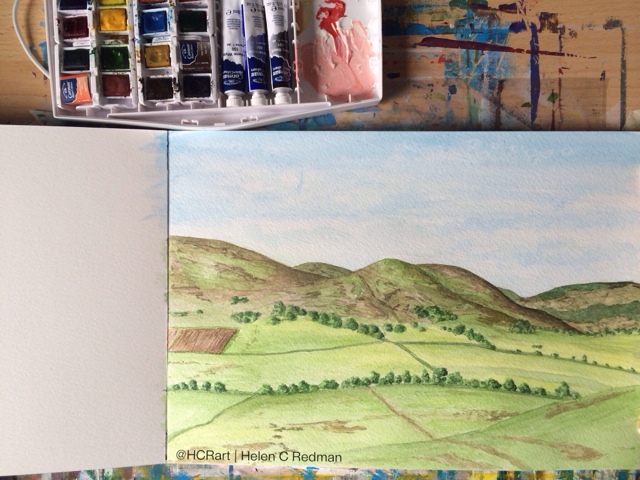
After the initial outlines were created I started blocking in a couple of pale washes over the whole sheet then started to build layer upon layer once each wash dried.
For the sky I used a small amount of scrunched up kitchen roll to take way some of the blue paint to leave ‘negative’ white clouds. Natural sponges also work well. The only problem with mine is that they are currently so well tidied away in my studio, I may have forgotten exactly where I tidied them too... Paper is also good to use if you accidentally put paint where you didn’t mean to or add colour and then realise it is far darker than you expected it to be; simply blot the wet paint away as quickly as possible.

When building up the painting, I find its best to work with decreasing volumes of water for each layer to really help to bring out the vibrancy of the paints. This is in addition to reducing the size of brush as I go. I’ll use a really small ‘0000’ brush at the end for the finer details.


For the record, the brush above isn't the tiny one, it's another brush I was using. I used 3 in total, that one, a medium sized flat brush and the tiny '0000' brush.


Some tips for watercolour painting:
• Use small bits of kitchen roll or toilet paper to quickly soak up any stray paint on your painting
• Don’t stress if you make a mistake, try and keep going
• Keep the mixing water clean
• Keep your palette closest to the area of painting on which you are working (this avoids paint dripping from a loaded brush before you reach the area you’re wanting to paint)
• To paint darker areas let the previously painted area dry completely
If you’ve enjoyed this post or would like to see more of my art in future, be sure to follow me on social media! You can find me on Twitter and Instagram if you search for @HCRart.
You can also find me on FB:www.facebook.com/hcr.art
Helen
HCRart


 Helen C Redman
